Implementing a Custom DAM Connector in Sitecore (Part 2)
DAMs can be powerful tools for maintaining all content in a single repository. However, out of the box, Sitecore does not support any kind of external image linking within its image field type.
In the previous post, we discussed extending the image field type, so that Sitecore can store an external URL and display that image during render. This post will discuss implementing a custom dialog in Sitecore so that content editors can select an image to be saved to the image field.
Our goal in this series of posts is to create a framework for implementing a custom connector for external images that can be extended for usage with any DAM. Within the series:
- Extending the Image Field Type
- Implementing a Custom Dialog for a DAM
- (Bonus) Creating a Media Handler for Optimizing External Assets using Dianoga
Implementing a Custom Dialog for a DAM
The first step for developing a custom dialog for your DAM is to determine if your DAM has an API or universal connector you can use to fetch assets. In my scenario, the DAM vendor provides a universal Javascript connector that I was able to implement into Sitecore.
This is where things will get more custom for you, so I won't go into major detail besides what Sitecore itself is looking for on image selection.
Sending back the right data
Your dialog will need to send the right data back to Sitecore on selection of the asset. That code is going to look something like this in your Speak dialog (or other Javascript file):
The above code gets interpreted and called upon in one of two places. Either in content editor or in experience editor - you can call the same dialog you create for both.
Interpreting the return in Content Editor
We need to accomplish a few things before we call things done for the content editor side of this integration:
- Show the image in content editor
- Call our custom dialog
- Set values in the XML for the field so our previous field renderer knows how to render the image correctly
See below for an annotated example implementation that extends the Sitecore.Shell.Applications.ContentEditor.Image class :
The above code renders the custom external URL image within content editor. Note that it uses our thumbnail source, which we will set later from our DAM.
The above methods are getting the source for the image as the external URL/thumbnail source instead of from a media item. We need to override these methods so the image is sourced properly.
This method gives tooltip information during rendering in content editor for the author - in this case, if we have an external URL, show the author what URL they are referencing.
This is how everything ties together. When Sitecore receives a message that we want to browse our DAM image, it launches the DAMApp that we created with the Javascript code earlier. Note that this can just be an index.aspx page at the file path /sitecore/shell/client/Applications/DAMApp folder. It's certainly easier to set it up that way than as a Sitecore SPEAK page, but it is possible. When the application/connector sends back data, the JSON is deserialized and then we set the values on the XML raw value of the image. Any constants are fine here, as long as they don't overlap with reserved ones in Sitecore (and they are the same ones you are using for rendering).
We also have to override the properties dialog for Sitecore here. This lets us do things like set alt text on our DAM images. The above code mostly just creates a mocked up media item so Sitecore is happy with setting alt text on the content item being edited.
You will need to register this so Sitecore can see it:
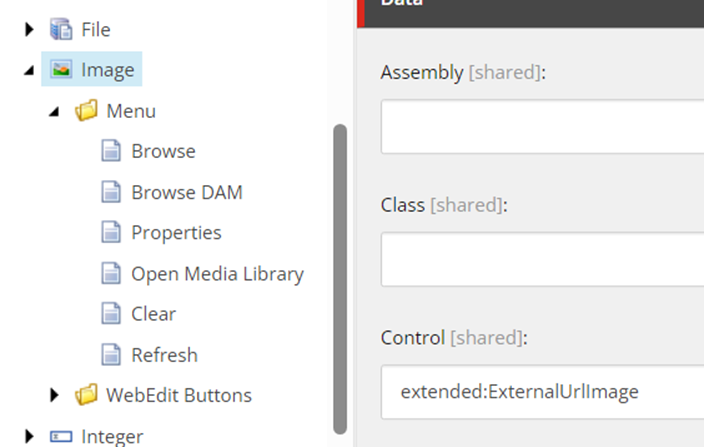
Set the "Control" field on the /sitecore/system/Field types/Simple Types/Image item in the core database equal to "extended:ExternalUrlImage":

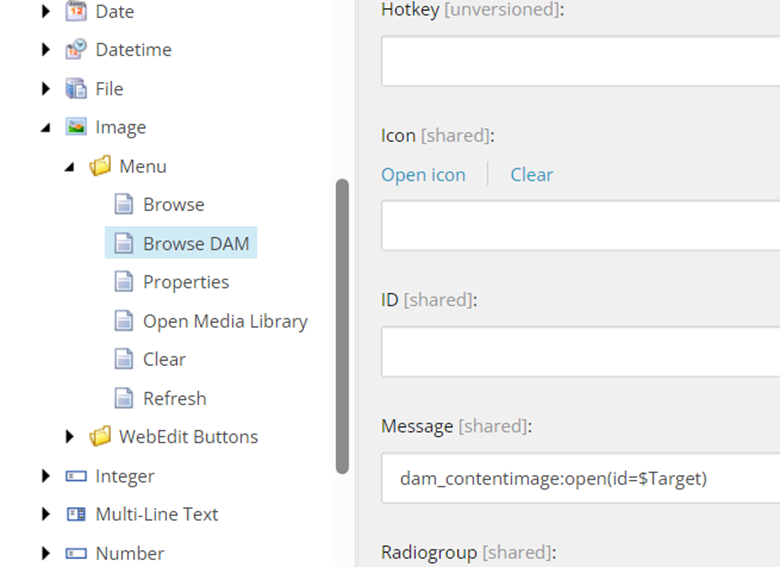
Then, to have your dialog work, add a new item under /sitecore/system/Field types/Simple Types/Image/Menu in the core database.
Set the message to the message you are interpreting in your Handle Message.

This should wrap up things for the content editor side of things.
Interpreting the return in Experience Editor
The code for experience editor works much the same as content editor, but it doesn't need to interpret as many things (since the image is just displayed on the page instead of in a separate box in content).
This does the same thing as our BrowseDAMImage in Content Editor, but that is all we need for the command in Experience Editor.
Register the command in a patch config:
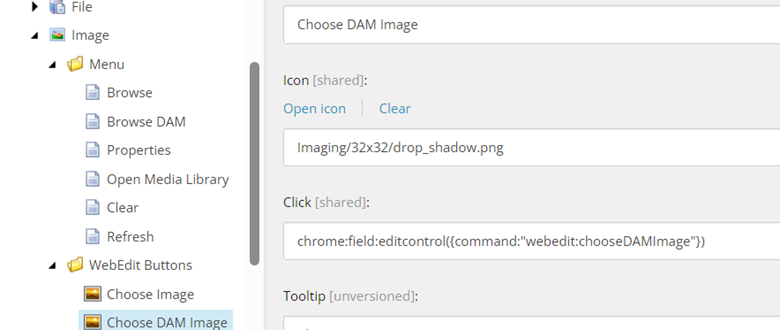
After that, create a new Web Edit button under:
/sitecore/system/Field types/Simple Types/Image/WebEdit Buttons

This should be all you need in order to get this working in both Experience editor and Content editor.
Wrapping Up
What we have done in this post is:
- Provided guidelines for sending back information from your DAM to Sitecore to store values in raw XML for external URLs using a custom dialog
- Created an image control for external URLs for Content editor
- Create a command for users in Experience editor to select images from a DAM and store values
What we'll tackle in the next in the series:
- Serving our external (DAM) images optimized, for when a DAM is unable to serve in next gen formats, or DAM asset uploaders do not upload optimized images

